> For the complete documentation index, see [llms.txt](https://docs.apica.io/llms.txt). Markdown versions of documentation pages are available by appending `.md` to page URLs; this page is available as [Markdown](https://docs.apica.io/flow/list-of-forwarders/dynatrace-forwarding.md).
# Dynatrace Forwarding
This page explains how to forward logs to Dynatrace from Apica.
To Generate an API Key from Dynatrace, please follow the instructions in this [link](https://www.dynatrace.com/support/help/dynatrace-api/basics/dynatrace-api-authentication).
NOTE: Make sure to add the "logs.ingest" scope during token creation.
### Steps to Create Dynatrace Forwarding
To forward your logs to Dynatrace, begin by logging into Apica's website.
* Navigate to the **`Integrations`**tab, select the option for **`Forwarders`**, and then **`Add Forwarder`**
* Next, choose **`Dynatrace(HTTP event collector)`** from the available options; this will bring up a new form with fields such as `API Key`, `Host`, `Tags`, etc. Fill out the required data in these fields and click **`Create`**.
Create Forwarder:
Copy
```
Api_Key:
Host: <{DYNATRACE_ENV_ID}.live.dynatrace.com>
Tags: logflow
Type: _json
Name: Dynatrace
```
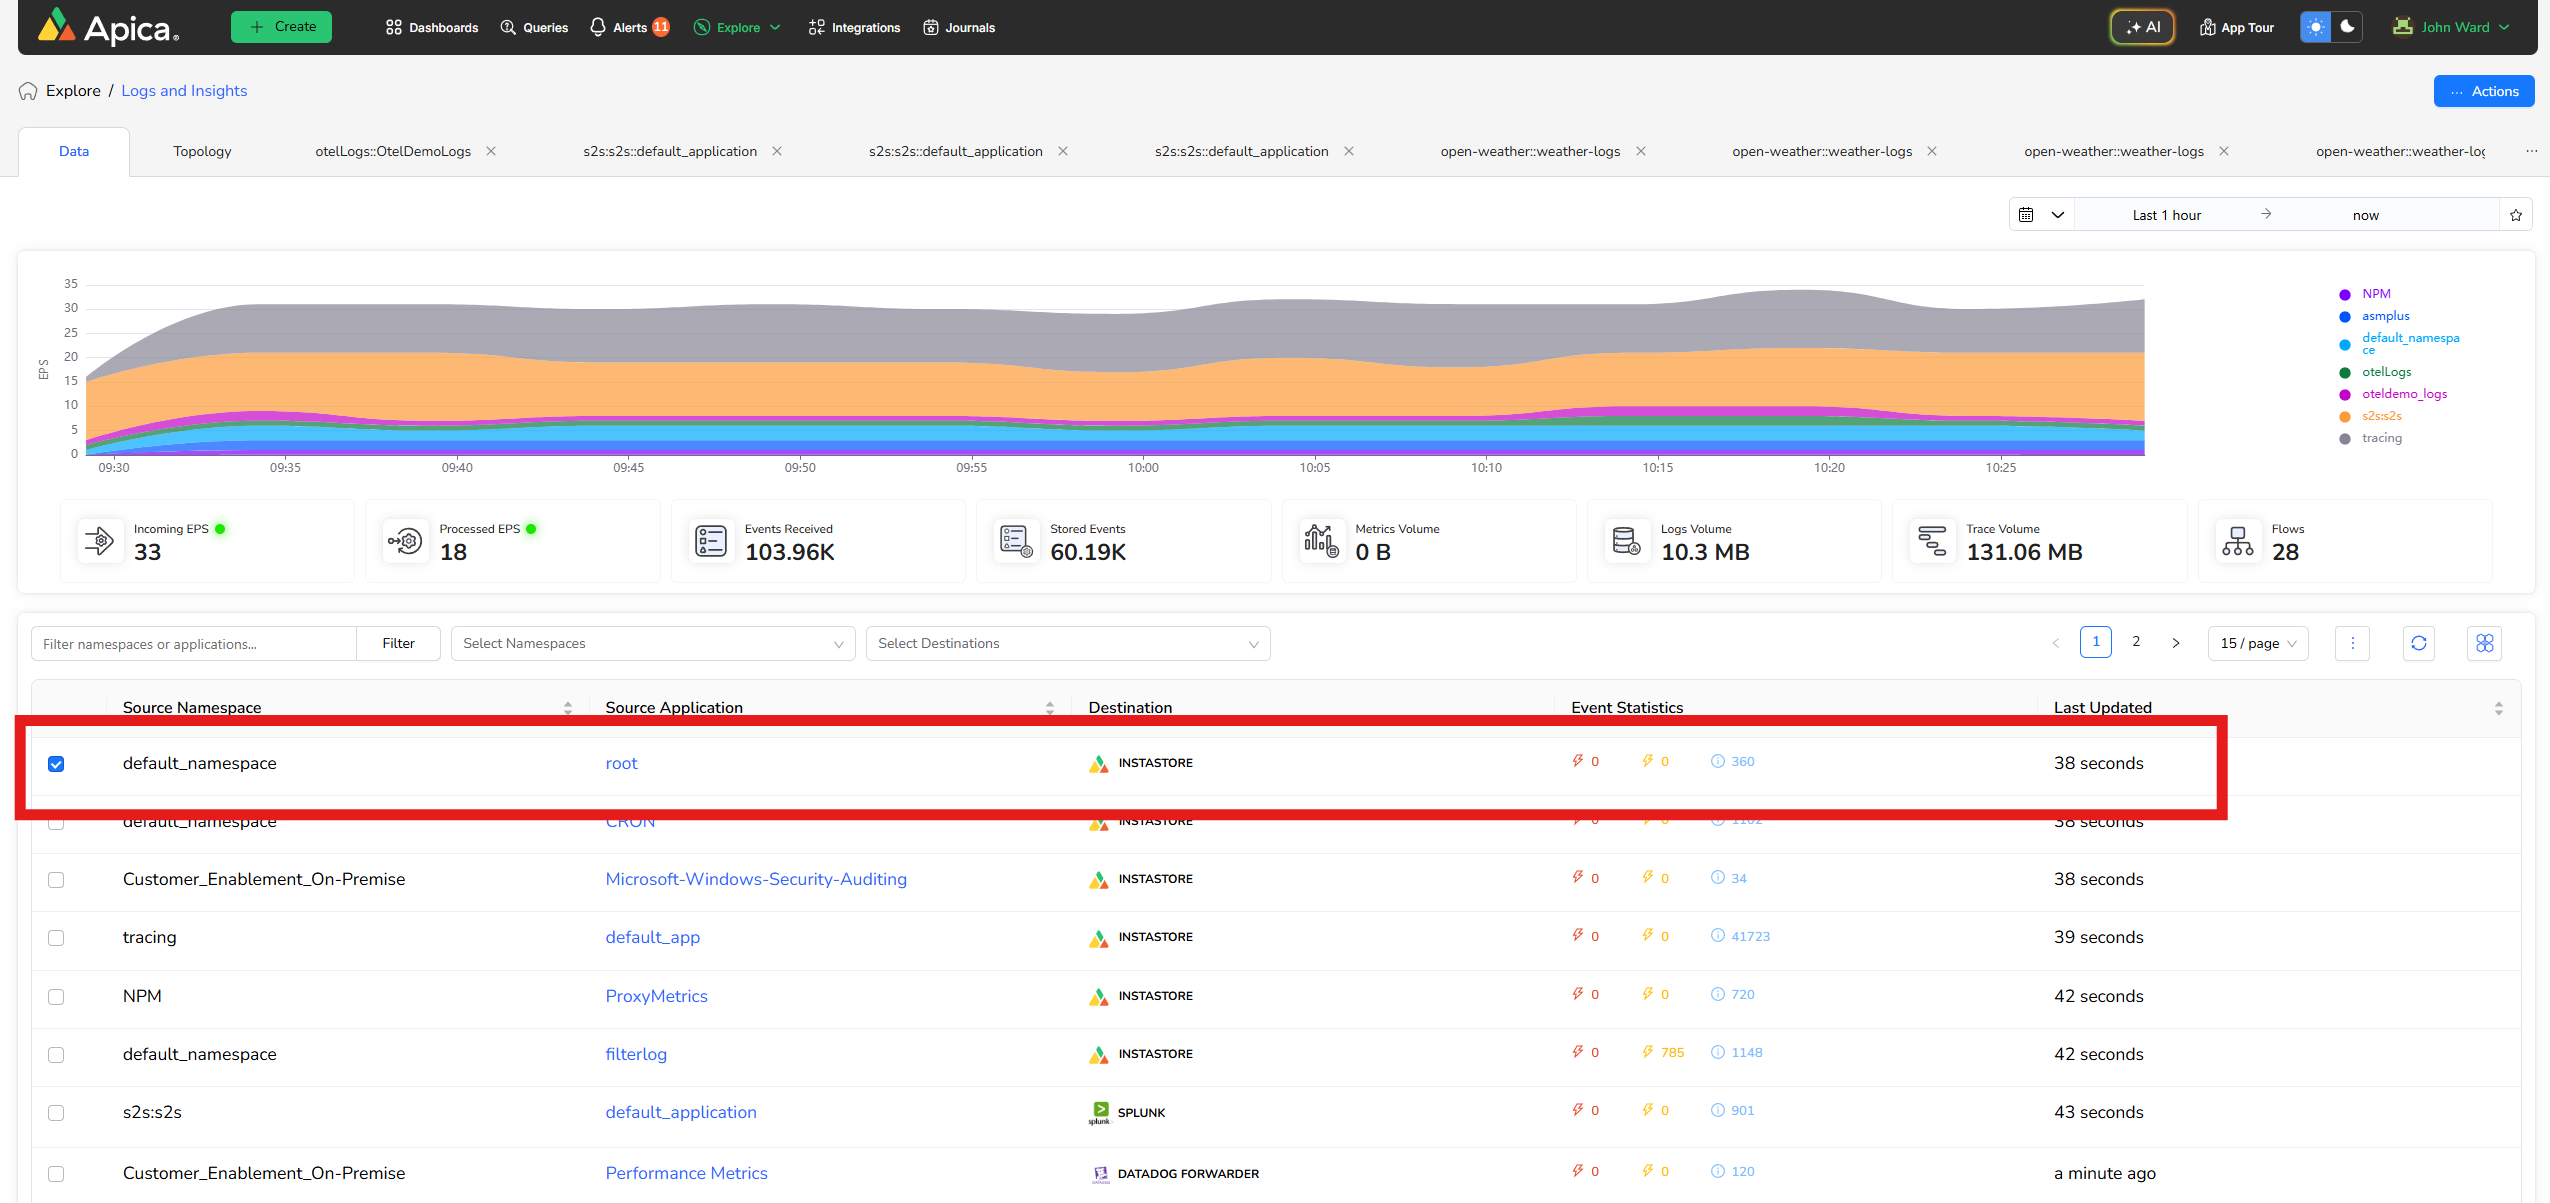
* Next, head over to the **`Explore`** page and pick out a namespace you wish to forward your logs to Dynatrace.
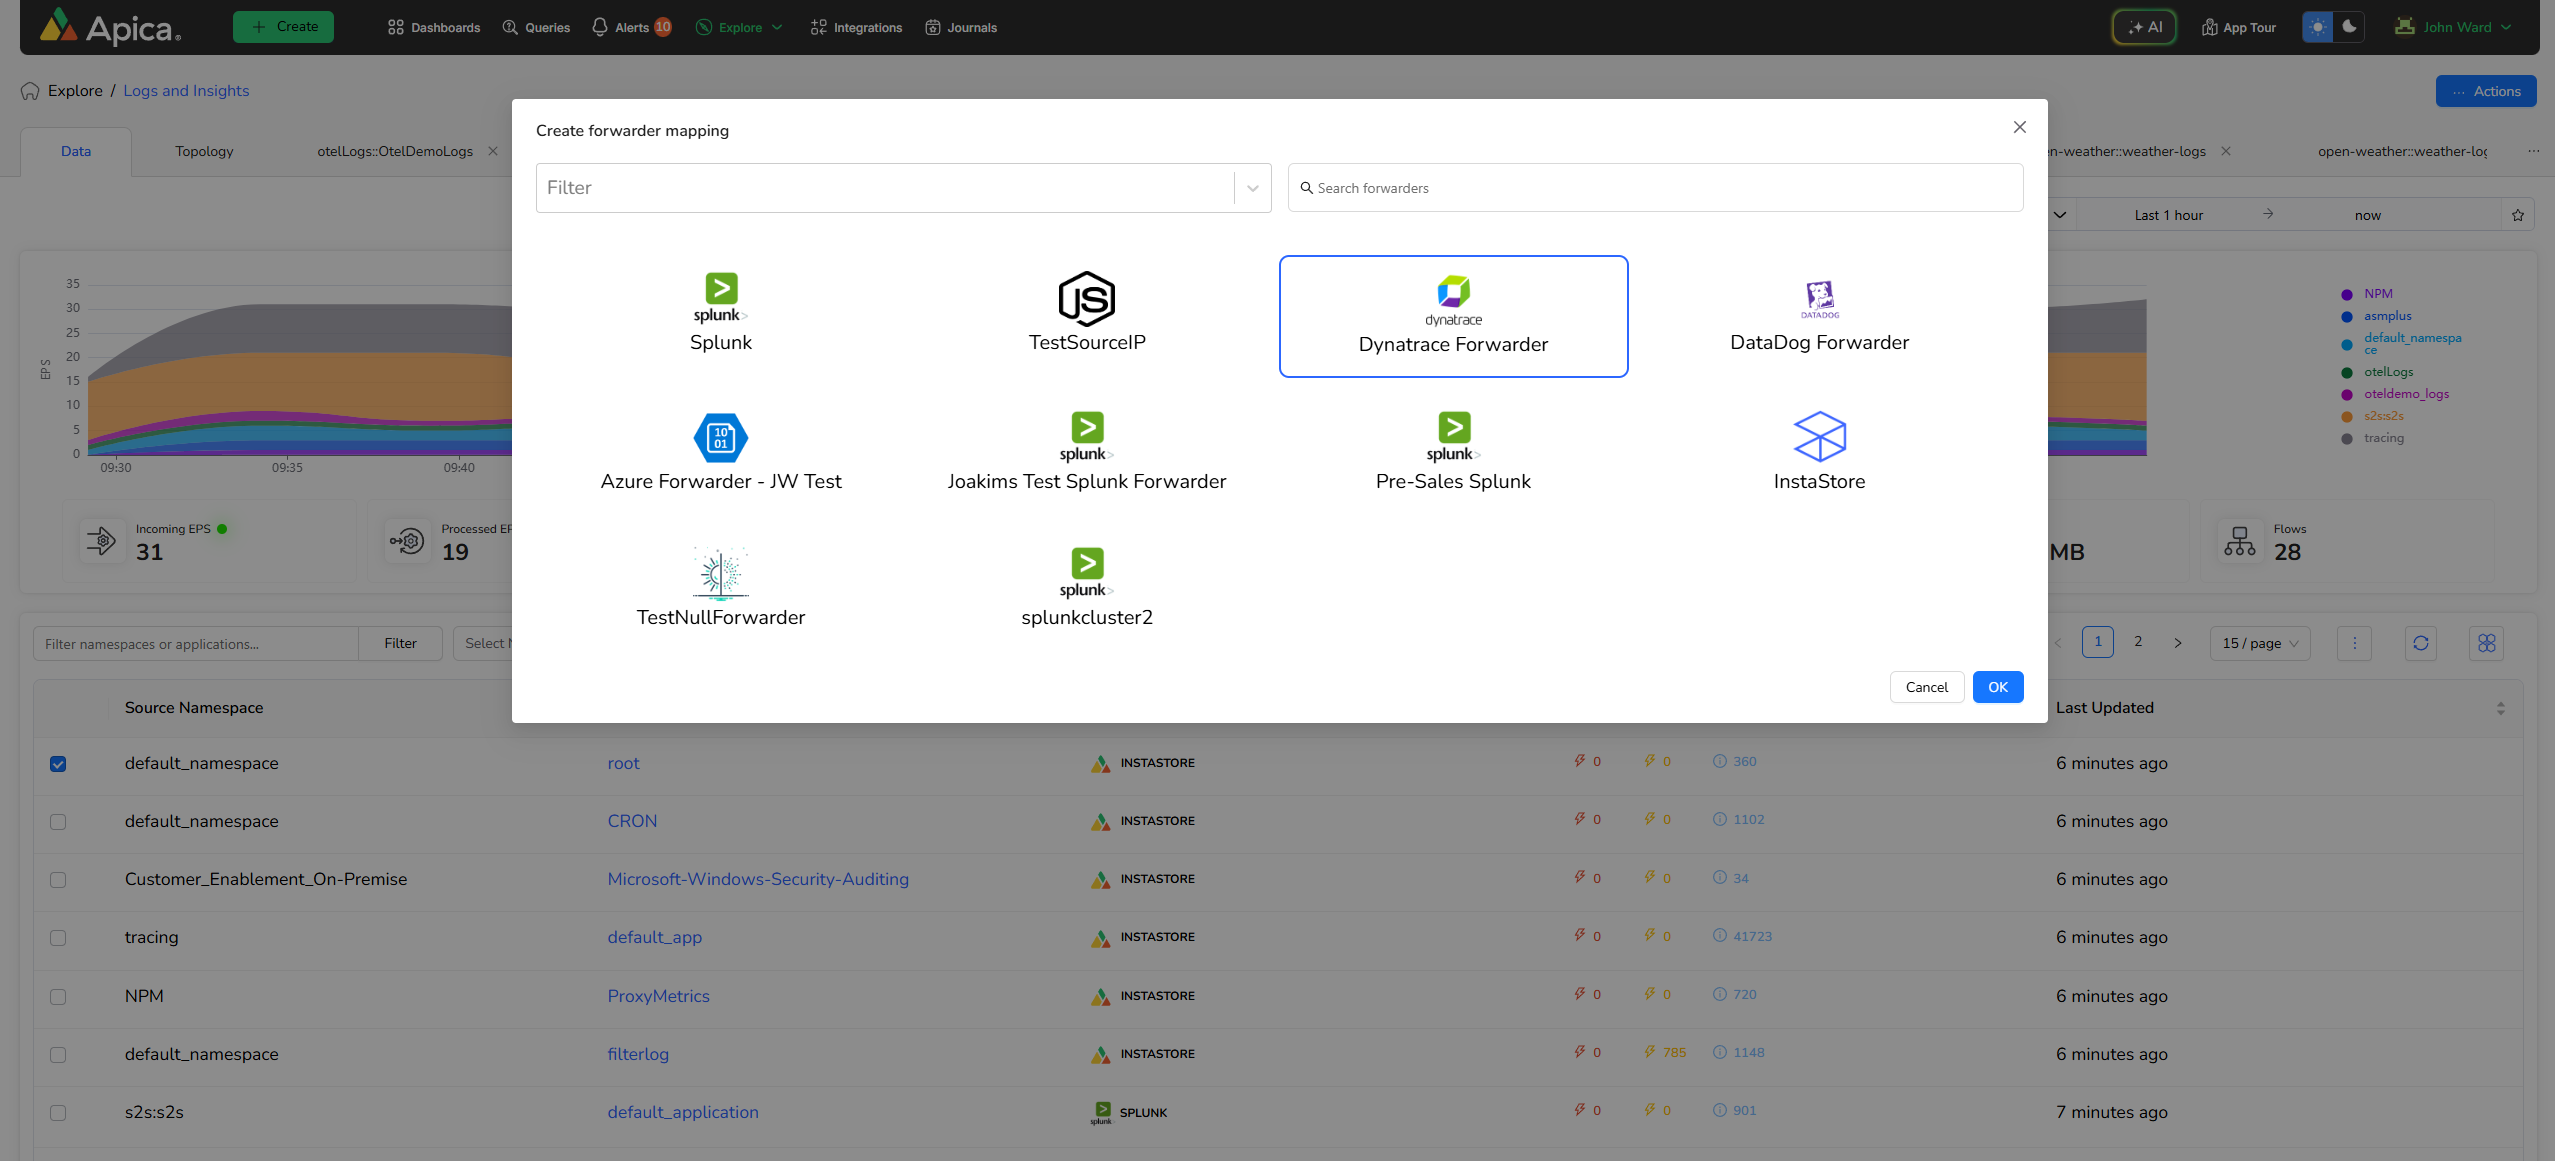
* Click on the three dots icon located next to the calendar and opt for **`Map Forwarder`**; this will open a new modal that allows you to choose the newly created Dynatrace forwarder schema (this can be identified via its Dynatrace icon).
* Confirm your selection by clicking **`OK`**.
* A successful mapping is indicated by a popup showing that namespace-application pairs are connected with respective forwarders; additionally, you'll notice an updated Namespace Forwarder status in effect.
* Your logs are now being forwarded to Dynatrace.
> To help make the steps easier to understand, below are the screenshots illustrating each of the instructions given above.