
Forwarding Amazon-Linux logs to Apica Ascent using Fluent Bit
This guide takes you through how you can set up log forwarding from Linux systems hosted on AWS to Apica Ascent using Fluent Bit. The guide leverages an installation script which you can download from our GitHub repository.
Before you proceed with this setup, be sure to download the install.sh and td-agent-bit.sh scripts located here:

The install.sh script carries out the following functions:
Installs Node Exporter, which exposes various metrics from your Linux machine (CPU, RAM usage)
The td-agent-bit.sh script carries out the following functions:
Installs Fluent Bit on your Amazon-Linux systems which is used for forwarding logs to Apica Ascent.
Installing Fluent Bit
In order to install Fluent Bit to forward Linux logs, do the following:
Download the
td-agent-bit.shscript from the repository shared above.Make the script executable by running the following command.
Set the cluster details
Execute the script by running either of the following commands.
The script executes and carries out the following:
Installs Fluent Bit
Checks your OS versions and updates your sources list, as mentioned in the Fluent Bit documentation.
Configures Rsyslog to add
omfwd, as shown below.
The script also places the td-agent-bit.conf file under the default Fluent Bit installation folder /etc/td-agent-bit. The script will configure [OUTPUT] section of the td-agent-bit.conf file based on your Ascent cluster, as shown below.
Installing Node Exporter
To install Node Exporter, do the following.
Download the
install.shscript from the repository shared above.Make the script executable by running the following command.
Set the cluster details as shown below.
Execute the script by running any of the following commands.
The script executes and installs Node Exporter
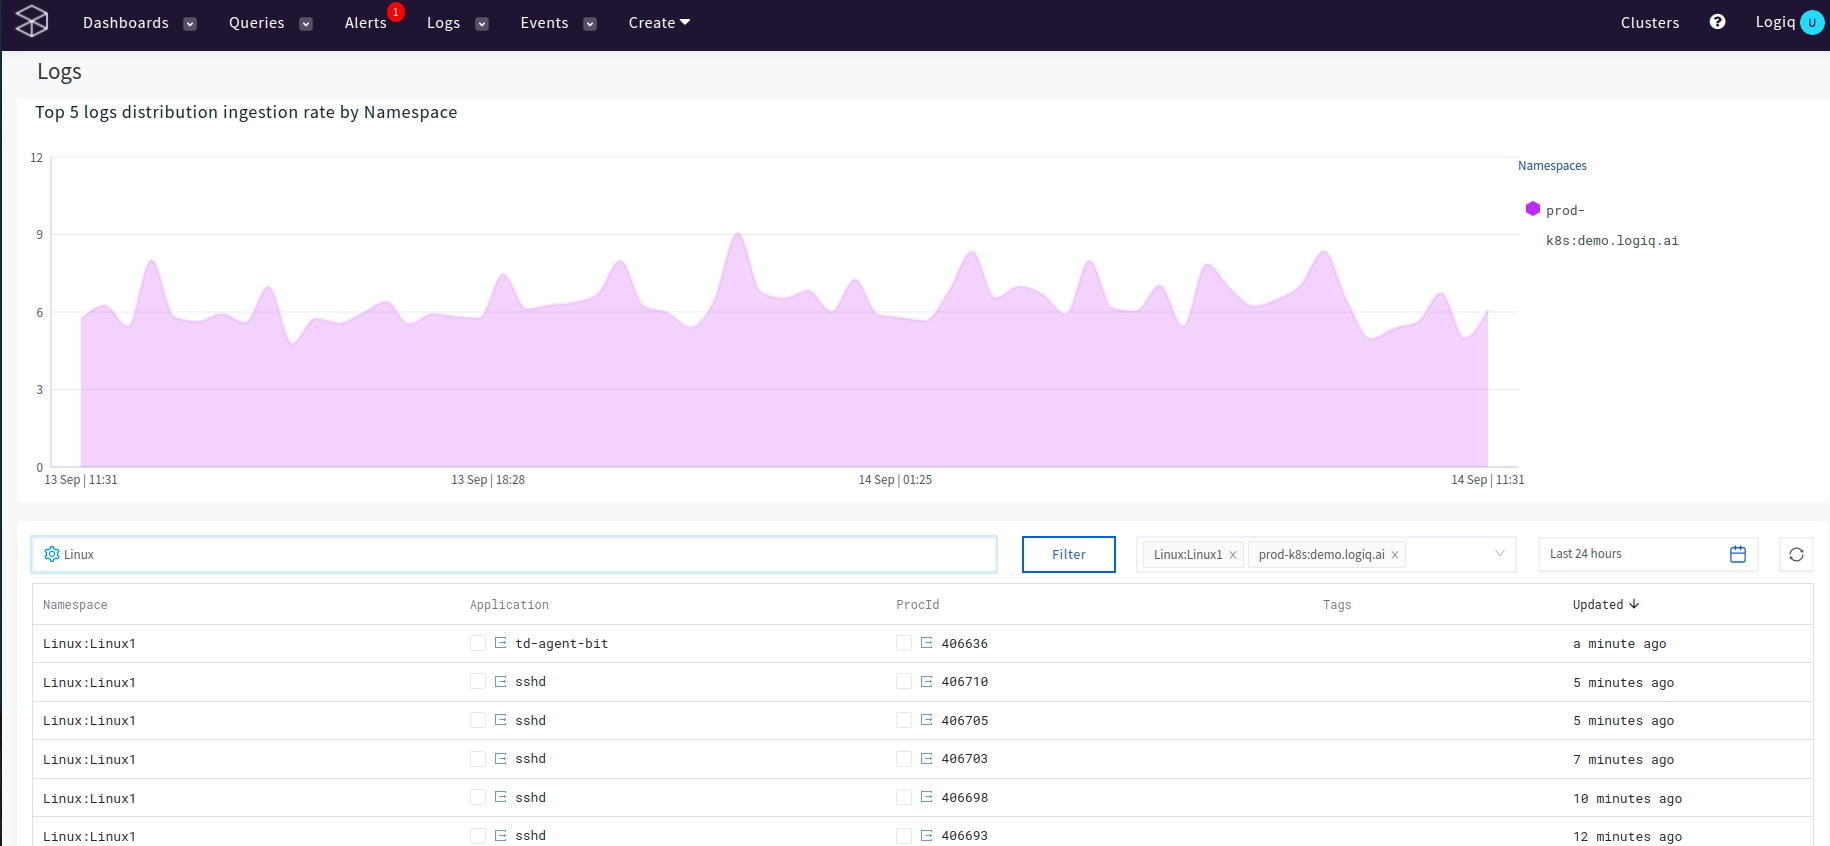
You should now see your Amazon-Linux logs being ingested into the Linux:Linux1 namespace on your Apica Ascent UI.

Forwarding Amazon-Linux logs to Apica Ascent using Fluent Bit
The script isntall.sh included in this folder carries out the following functions:
Installs Node Exporter, which exposes various metrices from your Linux machine(CPU, RAM usage)
Installs Fluent Bit on your Amazon-linux systems which is used for forwarding logs to Apica Ascent.
The script td-agent-bit.sh included in this folder carries out the following functions:
Installs Fluent Bit on your Amazon-linux systems which is used for forwarding logs to Apica Ascent.
In order to install Fluent Bit to forward Linux logs, do the following (Follow the same instructions for installing Node-exporter and run install.sh).
Download the
td-agent-bit.shscript from this folder.Make the script executable by running the following command.
Set the cluster details
Execute the script by running either of the following commands.
The script executes and carries out the following:
Installs Node Exporter (optional)
Installs Fluent Bit
Checks your OS versions and updates your sources list, as mentioned in the Fluent Bit documentation.
Configures Rsyslog to add
omfwd, as shown below.
The script also places the td-agent-bit.conf file under the default Fluent Bit installation folder /etc/td-agent-bit. The script will configure [OUTPUT] section of the td-agent-bit.conf file based on your Apica Ascent cluster, as shown below.
You should now see your Amazon-Linux logs being ingested into the Linux:Linux1 namespace on your Apica Ascent UI.
Last updated
Was this helpful?