Deploying Apica Ascent on AWS EKS with Aurora PostgreSQL and ElastiCache Redis using CloudFormation
This creates its own VPC,Subnets and NAT gateways.
1. Overview
Link to Video: https://www.youtube.com/watch?v=3Yw7TfeojDQ
This guide will take you through deploying Apica Ascent on an AWS EKS cluster with Aurora PostgreSQL and ElastiCache Redis using CloudFormation and HELM. The installation will create user roles and policies that are necessary to create a GP3 storage class, a private S3 bucket, Aurora PostgreSQL and Elasticache with default encryption and bucket policies.
2. EKS K8S compatibility
3. AWS Resources
The Cloud formation template provisions the following resources
S3 Bucket
EKS Cluster
EKS Node Pools
VPC (Private and Public Subnets) and related things like Internet Gateway and NAT Gateway
Aurora PostgreSQL
ElastiCache Redis
3.1 IAM Role, Aurora PostgreSQL and ElastiCache
IAM Role, Aurora PostgreSQL and ElastiCache can be created using Cloud formation template which is available on this link: https://logiq-scripts.s3.ap-south-1.amazonaws.com/apicasingleset.yaml, details of created resources will be in the output section of Cloud formation, these details are used in section 5 (step 4 and 5).
AmazonEKSWorkerNodePolicy
AmazonEC2ContainerRegistryReadOnly
AmazonEKS_CNI_Policy
AmazonEKSClusterPolicy
AmazonEKSServicePolicy
RDSPolicy
ElastiCachePolicy
Aurora Endpoint
ElastiCache Endpoint
4. Pre-requisites
Before you begin, ensure you have the following prerequisites.
You have permission on your AWS account to create an Elastic Kubernetes Service, S3 Bucket, Aurora PostgreSQL, and ElastiCache.
Above mentioned roles, Aurora and ElastiCache endpoints are created.
The AWS CLI is installed and configured on your machine
Helm 3 is installed on your machine.
5. Deployment steps
5.1 Create EKS Cluster
Step 1: To prepare for the deployment, first obtain the Cloudformation template that will be used at the URL: https://logiq-scripts.s3.ap-south-1.amazonaws.com/Apica/EKSCluster-singleset.yaml
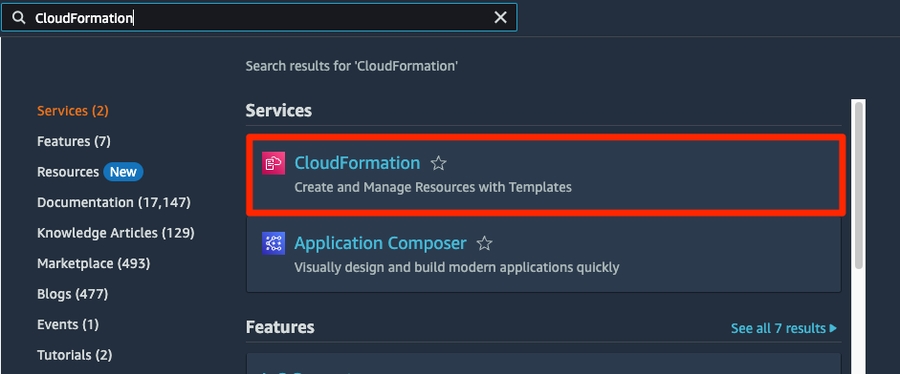
Step 2: On your AWS Console, navigate to CloudFormation and select Create stack.
Step 3: Provide the options as shown below
Under Prerequisite - Prepare template, select Template is ready.
Under Specify template > Template source, select Amazon S3 URL - Here you will specify the template URL from Step 1 above.
Step 4: To deploy the EKS cluster, we need to enter the ARN of the IAM Role for EKS that was created in section 3.1. We need a VPC with 2 Private subnets. Select them from the Network Configuration and Subnet configuration dropdown lists and they were created by the previous cloudformation template.
The EKS cluster will need the following node groups. Ensure that you select the node groups as specified in the following table.
ingest
c5.xlarge (4 Core 8 GB RAM)
2
common
c5.2xlarge (8 Core 32 GB RAM)
2
Step 5: Provide the S3 bucket name from section 3, the Cloudformation will create the S3 bucket, S3 bucket name needs to be globally unique.
Step 6: Click Next, and follow the instructions on the screen to create the stack.
5.2 Verify EKS setup and tag subnets
Step 1: Once the stack is fully provisioned, connect to the AWS EKS cluster using AWS CLI as mentioned below. To do this, you need to install and configure AWS CLI.
Step 2: Once the EKS cluster is up and running, execute the following commands to check the health of the cluster.
5.3 Enable GP3 storage class for EKS
Step 1: Download this yaml file and run the commands mentioned below:
Step 2: Once the chart is installed, you should see pods similar to those shown below in your kube-system namespace.
5.4 Deploy Apica Ascent using HELM
Step 1: Create the apica-ascent namespace in your EKS cluster
Step 2: Download the values file below and customise it per the instructions below.
Step 2: Replace the following variables in the values.yaml and proceed to install the Apica Ascent stack on your EKS cluster.
awsServiceEndpoint: https://s3.\.amazonaws.coms3_bucket: S3 bucket names3_region: <s3 region>redis_host: <ElastiCache endpoint>
postgres_host: <Aurora endpoint>
postgres_user: <>
postgres_password: <>
alert: "PrometheusDown" expr: absent(up{prometheus="<namespace>/<namespace>prometheus-prometheus"})
Step 4: Deploy Apica Ascent stack using helm and updated values file, see below for additional options to customise the deployment for enabling https
Step 5 (Optional): To enable https using self-signed certificates, please add additional options to helm and provide the domain name for the ingress controller. In the example below, replace "ascent.my-domain.com" with the https domain where this cluster will be available.
Step 6: Once the EKS cluster is created, add the VPC cidr in the Postgresql and Elasticache security group (create by first cloudformation template) inbound rules for port 5432 and 6379. Step 7: After the installation is complete execute the below command to get the service endpoint
Last updated
Was this helpful?


